Using Mullvad VPN in restrictive locations
Mullvad app Connectivity Bridges Windows Linux Android Mobile Installation macOS Desktop iOS Multihop Censorship circumvention
上次更新:
Some countries use firewalls to block VPNs. They use lists of known VPN server IP addresses and Deep Packet Inspection to find traffic that looks like VPN traffic, and then they block or slow down that traffic.
This guide covers different settings and methods to connect to Mullvad VPN from networks and countries where connecting to a VPN is difficult. This includes countries such as China, Egypt, Iran, Pakistan, Russia, Saudi Arabia, Turkey, Turkmenistan, United Arab Emirates and Uzbekistan.
What this guide covers
- Countries
- Mullvad VPN app workflow
- Using Multihop to exit in your preferred location
- Getting started with Mullvad
- - Creating a Mullvad account
- - Adding time to your Mullvad account
- - Downloading the Mullvad VPN app
- - Logging in to the Mullvad VPN app
- Anti-censorship methods
- Using WireGuard
Countries
Russia
The Roskomnadzor in Russia is blocking most Mullvad servers. Try to connect to different countries, cities and servers in Europe, using QUIC or Shadowsocks on port 443 or LWO (on port 53) Anti-censorship obfuscation. It is more likely to connect using Wi-Fi than mobile data as Mullvad does not bypass whitelists.
iOS: The Mullvad VPN app for iOS has been removed by Apple from the App Store in Russia due to laws/regulations. For users who already have the app, in-app purchases no longer work.
China
The great firewall of China is blocking most Mullvad servers in Asia. Try to connect to different cities and servers in the USA instead, using Shadowsocks on port 443, QUIC or LWO Anti-censorship obfuscation.
Mullvad VPN app workflow
The most efficient way to find a working connection is to try the Anti-censorship obfuscation methods one at a time with different locations. Follow these instructions.
Selecting an Anti-censorship obfuscation method
If you have enabled DAITA or Multihop then turn that off before you continue.
- Open the Mullvad VPN app settings by clicking on the ⚙️ gear icon in the top right corner.
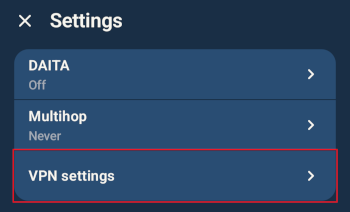
- Click on VPN settings.
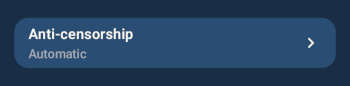
- Click on Anti-censorship.
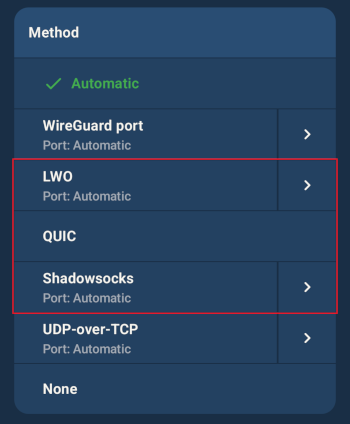
- Select an obfuscation method (LWO, QUIC or Shadowsocks).
- Try to connect to different countries, cities and servers around the world and see if it works.
- If you are unable to connect with the selected obfuscation method then try selecting another method.
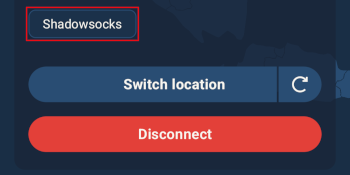
- To quickly get back to the Anti-censorship settings, click on the feature indicator for the active method.
- If you are still unable to connect then repeat steps 4 and 5 until you have tried all the methods.
- When you select Shadowsocks you can also try to select port 443.
- When you select LWO you can also try to select port 53.
- Read more below about the Anti-censorship obfuscation methods.
Selecting cities and servers
- When connecting to Mullvad, click on Switch location in the Mullvad app.
- Click on the 🔽 downwards button on the right side of a country to view the available city/cities.
This example shows USA with some cities: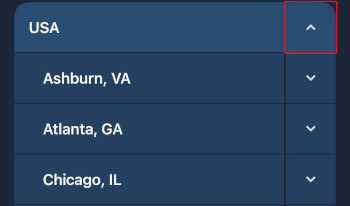
- Click on the 🔽 downwards button on the right side of a city to view the available servers.
This example shows Los Angeles with some servers: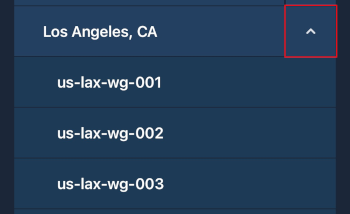
For detailed instructions, see the guide for your operating system:
Using Multihop to exit in your preferred location
If you are not able to connect directly the location that you want (because it's blocked by your Internet provider), then you can enable Multihop in the Mullvad VPN app settings. Then click on Switch location and select an Entry server that you are able to connect to, and select an Exit server anywhere you want.
1. Open the Mullvad VPN app settings by clicking on the ⚙️ gear icon in the top right corner.
2. Click on Multihop.
|
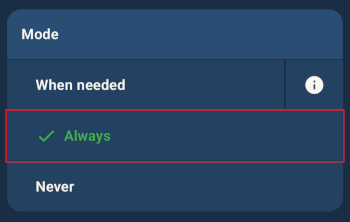
Mobile app: If you are using the mobile app then select Always. |
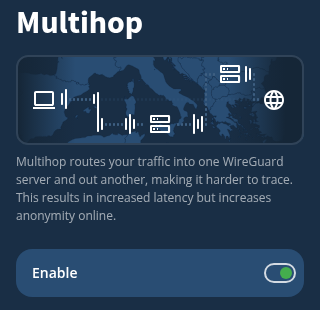
Desktop app: If you are using the computer app then turn on Enable. |
 |
 |
3. Go back and click on Switch location.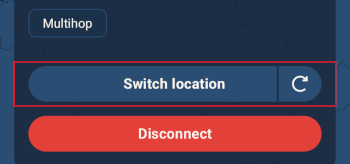
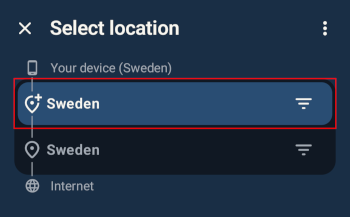
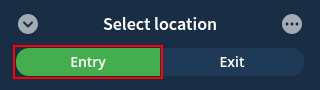
4. Select the Entry item.
|
Mobile app: If you are using the mobile app then tap on the Entry location which is underneath the text "Your device" in the top. |
Desktop app: If you are using the computer app then click on the Entry tab in the top of the location list. |
 |
 |
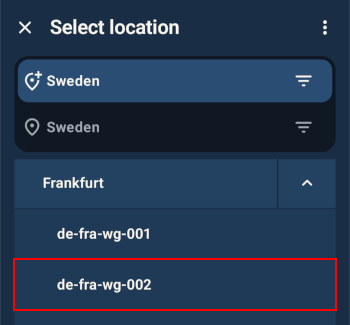
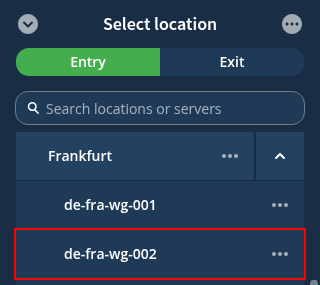
5. Select an Entry location (country, city or server) that you already know that you are able to connect to.
|
Mobile app example location: |
Desktop app example location: |
 |
 |
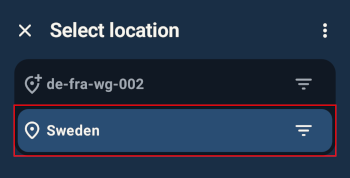
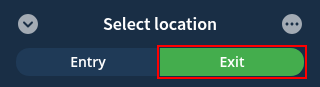
6. Select the Exit item.
|
Mobile app: If you are using the mobile app then tap on the Exit location which is underneath the Entry location. |
Desktop app: If you are using the computer app then click on the Exit tab in the top of the location list. |
 |
 |
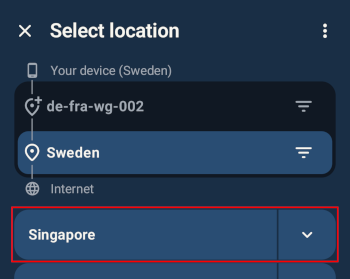
7. Select the exit location where you want to appear to be on the Internet.
| Mobile app example: | Desktop app example: |
 |
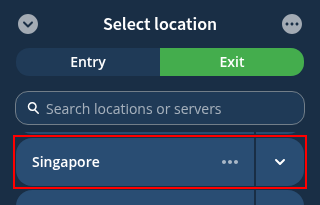 |
8 The connection screen will show the Multihop feature indicator and the connected servers.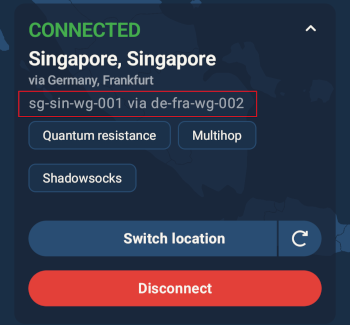
Getting started with Mullvad
Creating a Mullvad account
You can create a Mullvad account in one of the following ways:
- On our website.
- In the Mullvad VPN app.
- On our website using the onion address in Tor browser.
Adding time to your Mullvad account
You can add time to a Mullvad account in one of the following ways:
- On our website using different payment methods.
- In the Mullvad iOS app with an Apple in-app purchase.
- In the Mullvad Android app with a Google in-app purchase.
- On our website using the onion address in Tor browser (limited to crypto and cash payments).
Downloading the Mullvad VPN app
You can download the Mullvad VPN app in one of the following ways:
- On our website.
- On our GitHub page (see details below).
- (Android only) on Google Play or using the F-Droid app or website.
Downloading from GitHub
Go to GitHub and click on Assets to download the app for your operating system: Windows (exe), macOS (pkg), Ubuntu/Debian (deb), Fedora (rpm) or Android (apk). If you download the Android app here then you have to remember to update it manually in the future as the app won't notify you.
Logging in to the Mullvad VPN app
If you have a problem to log in to the Mullvad VPN app, then you can test the API connection by going to the Mullvad VPN app settings > API access. Then click on all the round buttons with three dots inside and select Test a couple of times. If it works then it should say "API reachable" for a moment. If it says "unreachable" several times then you can try to turn off that method. The app will use different bridge servers if you try to log in several times.
If you are using a phone then you can try it both on Wi-Fi and using mobile data.
Anti-censorship methods
You can try to enable the following Anti-censorship methods one by one:
- WireGuard port
- LWO
- QUIC
- Shadowsocks
- UDP-over-TCP
WireGuard port
This method does not use any obfuscation, so it's not effective against packet inspection firewalls. However it can be effective against firewalls that just block certain ports.
- Go to the Mullvad VPN app settings by clicking on the gear icon in the top right corner of the app.
- Do the following depending on which operating system you use:
Windows / macOS / Linux / Android:
Click on VPN settings > Anti-censorship and select WireGuard port. Then click on the arrow on the right side of "WireGuard port".
iOS: Tap on VPN settings > WireGuard port. - Select port 51820 or 53, or enter a custom port such as 123. Click on the information (i) icon to learn which ports you can use.
Obfuscation: LWO, QUIC, Shadowsocks, UDP-over-TCP
- Go to the Mullvad VPN app settings by clicking on the gear icon in the top right corner of the app.
- Click on VPN settings > Anti-censorship and select one of the methods described below.
LWO
LWO stands for "Lightweight WireGuard Obfuscation". This uses a random port number by default but you can enter a custom port, for example 53 which is the standard port for DNS. If you want to learn more, see our blog post Introducing Lightweight WireGuard Obfuscation.
QUIC
QUIC uses UDP port 443. It is made to make your VPN traffic look like normal web traffic.
Shadowsocks
Shadowsocks uses a random port often between 51900-51949 when set to Automatic. If it doesn't work then enter custom port 443.
To select Shadowsocks with port 443, follow these instructions:
- Open the Mullvad VPN app settings.
- Click on VPN settings.
- Scroll down and click on Anti-censorship.
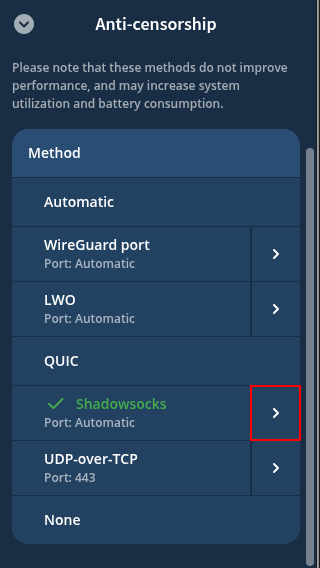
- Click on Shadowsocks to make it active.
- Click on the arrow button next to Shadowsocks.
- Enter 443 in the Custom Port field.
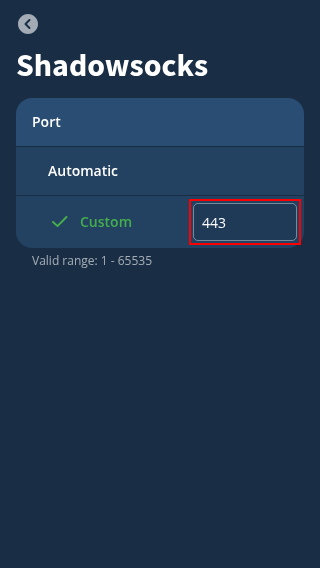
- Click on Custom to select it.
- Click on the arrow in the top left corner to go back.
- Verify that Shadowsocks is selected and that it says "Port: 443".
- Go back and close the settings.
Note when using port 443: If you use the Mullvad VPN app for iOS or Android and Multihop is set to Never, then the location list will show you only the servers that support port 443 when you enable it. However, if you use the Mullvad VPN desktop/laptop app (for Windows/macOS/Linux) then you will instead see the error message "No servers match your settings, try changing servers or other settings" if you try to connect to a server which does not support Shadowsocks on port 443.
UDP-over-TCP
This makes WireGuard work over TCP. You can choose between port 80, 443 or 5001.
Using WireGuard
Note that obfuscation methods are not available if you use WireGuard outside of the Mullvad app. If it is not needed in your location and you can not use the Mullvad app (the API may be blocked), then you can try to use the WireGuard app instead.
| Platform | Source | Guide |
|---|---|---|
| iOS | App Store | WireGuard on iOS |
| Android | Play Store | WireGuard on Android |
| Windows | WireGuard website | WireGuard on Windows |
| macOS | macOS App Store | WireGuard on macOS |
| Linux | Repository | WireGuard on Linux |