Port forwarding with Mullvad VPN
Última atualização:
This guide will show you how to set up port forwarding with Mullvad.
What this guide covers:
- What is port forwarding?
- Mullvad port forwarding overview
- Step 1 - Find your device name or WireGuard key
- Step 2 - Log in to Mullvad.net
- Step 3 - Add a port
- Step 4 - Test your port forwarding
- Windows - using iPerf3
- Linux - using nc
- macOS - using nc - Step 5 - Find the IP address to connect to
- Using Mullvad on a router
- Troubleshooting
- FAQ
What is port forwarding?
Port forwarding makes it possible for remote computers to access a specific computer or service within a private local area network (LAN).
For example, Gunilla has a web server on her private LAN that she wants Glenn to visit. She first requests a port to be forwarded to her. Then she configures her web server to listen to that port for any other traffic. Glenn can then connect to the exit IP address of the VPN server that Gunilla is using, as well as the port number, and voila – he has access!
It's like dialing a company's phone number (the IP address) and then punching in the extension number (port) to reach a particular person.
Mullvad port forwarding overview
Setting up port forwarding with Mullvad successfully requires several steps. Here is an overview.
- Add a port to a specific city and Mullvad device in your account on our website.
- Connect to a Mullvad server in the city that you assigned the port to.
- Allow the port in your firewall.
- Enter the port in an app or service.
- Check if the port is open from the Internet using our Port check tool.
- Find the Mullvad IP address to connect to from the Internet.
Read on for more details about this.
Step 1 - Find your device name or WireGuard key
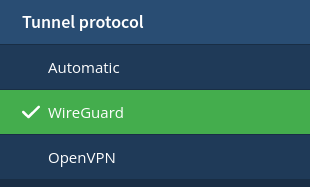
If you are using OpenVPN protocol then this step is not necessary. To set the protocol in the Mullvad app, open the settings and go to Advanced > Tunnel protocol.
If you use WireGuard protocol then you have to assign your port to your Mullvad device name when you create it. Each device name is associated with a WireGuard key. Version 2022.2 of the Mullvad desktop app introduced device management, which replaces the WireGuard key view previously found in the Mullvad app.
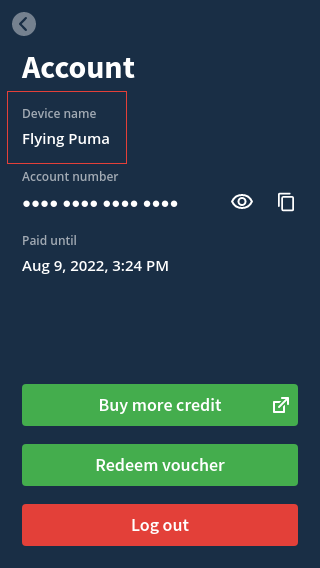
- In the Mullvad app you can find the device name in Settings > Account. The below picture shows the device name "Flying Puma", which we will use in Step 3 when we add a port.
- On a headless computer without a monitor you can use the Mullvad CLI (command-line interface) to find the WireGuard key. Run the command
mullvad tunnel wireguard key check.

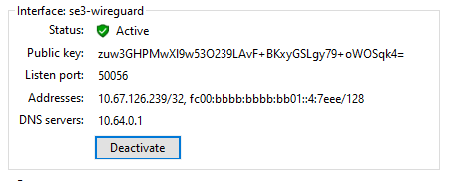
- If you are using the standalone WireGuard app for Windows or macOS, your WireGuard key shows as "Interface: Public key" on the imported server configuration.
- If you use standalone WireGuard in Linux you can see the key with the
wgcommand under "interface: public key". - If you use Mullvad with WireGuard on your router then you can log in with SSH to the router and run the
wgcommand.
Step 2 - Log in to Mullvad.net
You can add and manage your ports on our website.
- Log in to your Mullvad account page with your Mullvad account number.
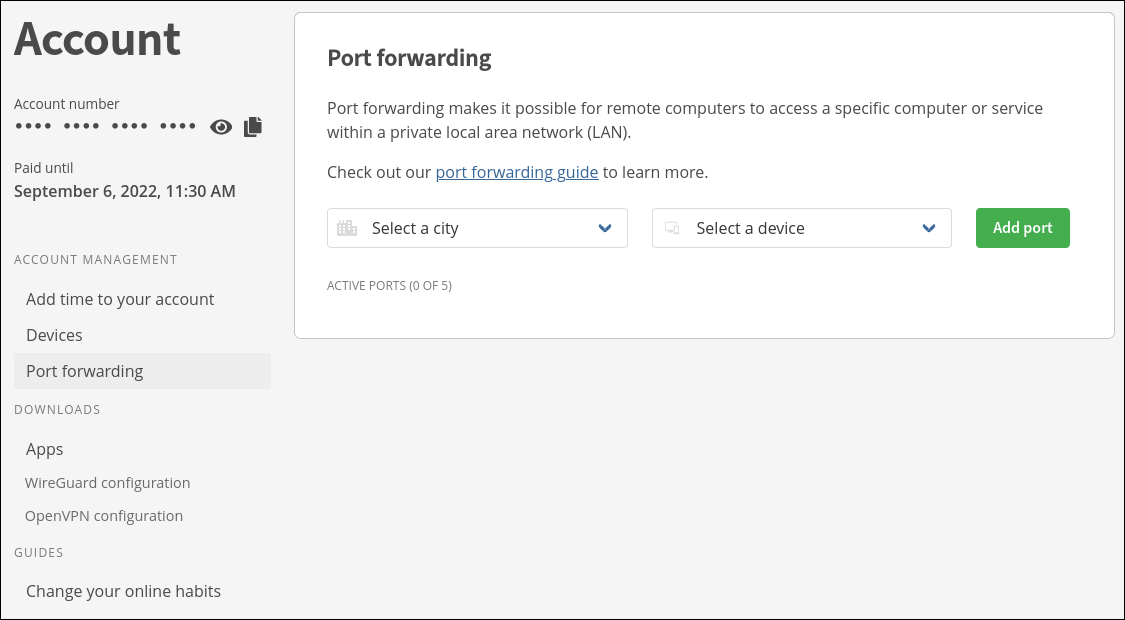
- Click on Port forwarding in the left column. If you can not see it then click on the menu button in the top left corner first.
The page looks like this.
In case your Mullvad account has no time left on it you will see the following message:
"You can't add ports because you don't have any time left on your account".
You can buy time using one of the payment methods in your account.
About automatic subscriptions
Although we have removed the option to create new automatic subscriptions, some users still have ongoing subscriptions via PayPal or a credit card. Port forwarding is not allowed for these accounts and it is not possible to add ports without cancelling the automatic subscription. The following message would be displayed on the port forwarding page.

If you have an automatic subscription then you can log in to your account, click on "Manage subscription" and cancel it. Your paid for time will remain on the account and you can make manual one-time payments from then on.
Step 3 - Add a port
You can add up to five ports. Each port can be used by one app or service.
Under Port forwarding you will see these drop down menus:

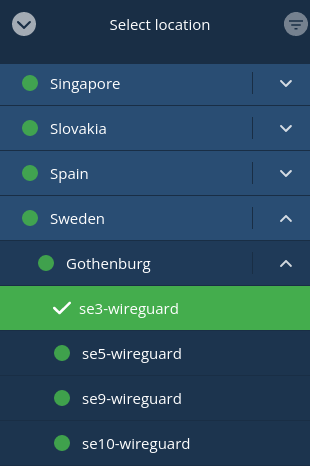
- Click on Select a city and select the city that you will connect to with Mullvad on the computer or device that you will forward the port to.
- Click on Select a device. Note the following:
- If you are using OpenVPN protocol then you can select No device (only OpenVPN).
- If you are using WireGuard protocol then you have to select the Mullvad device name that you are using with Mullvad on the machine that you will forward the port to.

- Click on Add port. The port is added to "Active ports". The port label includes the country and city designation and the port number.
Devices
Click on Devices in the left column. Here you can see the Mullvad device name, when it was created, the WireGuard key and the forwarded port that is assigned to it. The port label "se-got-57864" tells that the port will work with our se-got location, which is the short name for Sweden, Gothenburg, and the port number is 57864.
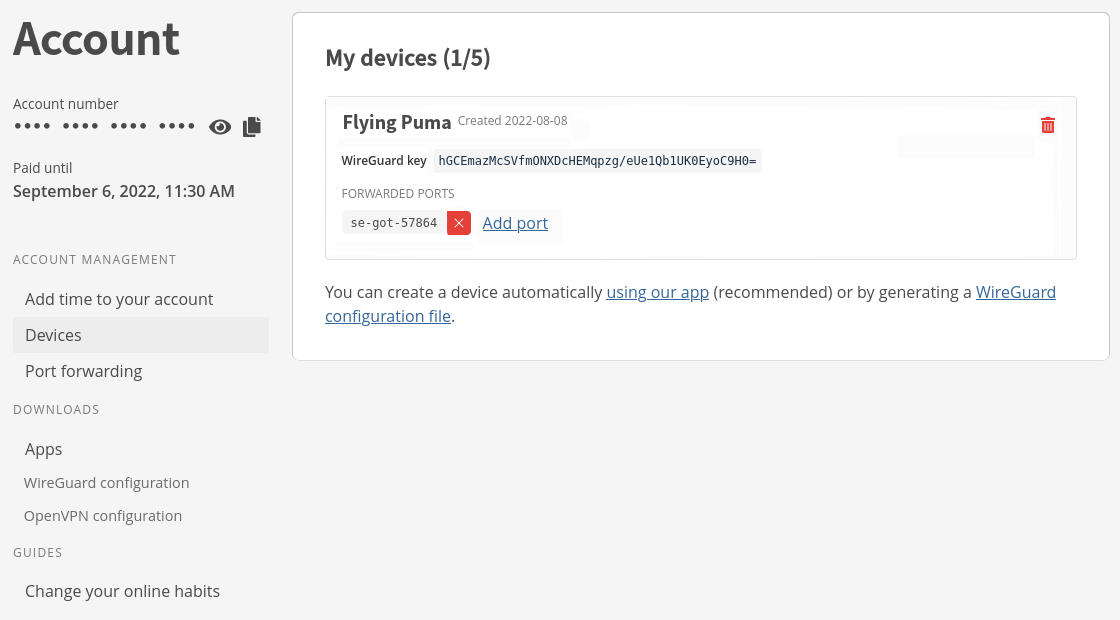
How to remove a port
If you want to remove a port, click on the red button with an X on the right side of the port number. Do not click on the trash can icon next to the device, unless you want to remove your Mullvad device and WireGuard key.

Step 4 - Test your port forwarding
Once you have added a port, you can test it to make sure that it's working.
Remember to connect to the city you specified for the port when you added it. If you are already connected to the city then reconnect to it.

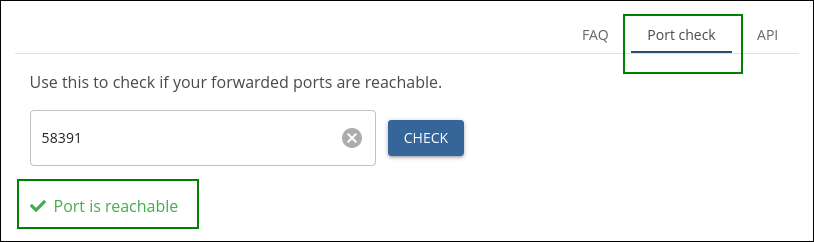
If you already have an app or service that is listening on the port then you can use our Connection check (click on the "Port check" tab) to test it.
In case this fails we recommend that you quit the app or stop the service and follow the instructions below to test it with iPerf or nc first. Also see the Troubleshooting section below.
Windows - using iPerf3
The following instructions are specific for Windows users, but iPerf3 can also be used with other operating systems.
- In a browser, navigate to https://iperf.fr and click on "Download iPerf binaries."
- Scroll down to "Windows 64 bits" and click on the latest iPerf version in the top to download it.
- Open the ZIP file and copy the folder within it.
- Open your Downloads folder and paste in the folder you just copied.
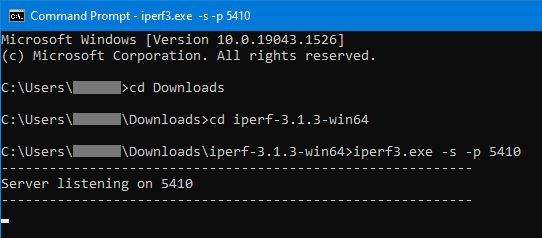
- Right-click on the Windows Start button and click on "Command Prompt".
- Run
cd Downloads. - Run
cd iperf-3.1.3-win64. - Run
iperf3.exe -s -p 5410(replace "5410" with the port that you have been assigned). - In the Windows Firewall pop-up window, click on "Allow access". Make sure that it's allowed in the Public network that Mullvad uses. If you have a third-party firewall, make sure that it is not restrictive.
- The iPerf3 service is now active. Do not use the port in another app at the same time.
- Now you can test your port with our Connection check (click on the "Port check" tab), or use the following command (replace 5555 with your port):
curl https://ipv4.am.i.mullvad.net/port/5555
Linux - using nc
Follow these instructions and replace "5555" with the port that you received.
Open the port in the firewall using for example:
sudo iptables -I INPUT -p tcp --dport 5555 -j ACCEPT
or sudo ufw allow 5555.
- Install curl and netcat or ncat if you don't already have it.
- In a terminal window, run
nc -l -p 5555. - In another terminal tab or window, run
curl https://ipv4.am.i.mullvad.net/port/5555(if you wish to test ipv6, replace "ipv4" with "ipv6"). - If everything is working properly, the result will show "reachable:true".
macOS - using nc
Follow these instructions and replace "5555" with the port that you received.
- Open Terminal.app.
- Use the command
nc -l 5555 - In another terminal tab or window, run
curl https://ipv4.am.i.mullvad.net/port/5555(if you wish to test ipv6, replace "ipv4" with "ipv6"). - If everything is working properly, the result will show "reachable:true".
Step 5 - Find the IP address to connect to
In order to connect to your app or service from the Internet you have to use your Mullvad exit IP on the Mullvad VPN server, and not your own public IP address. The port connection goes to the Mullvad VPN server and is forwarded through your VPN tunnel.
You can connect to a specific Mullvad server in the city that the port was assigned to. However your IP address can still change when you reconnect. We do not provide completely static or dedicated IPs as it's not good for privacy. It is recommended to use a dynamic DNS service to update the IP address automatically when it changes, if you need to connect to the address.
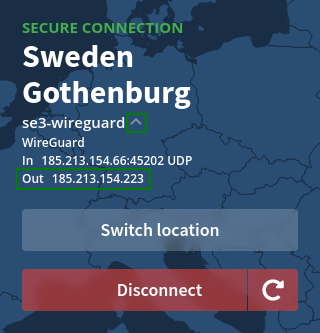
If you use the Mullvad app you can see your exit IP in the app if you click on the server name to show the connection details.
If you do not use the Mullvad app you can run the following command in a Terminal (Linux/macOS) or Command Prompt (Windows) on the machine that is running Mullvad.
curl https://am.i.mullvad.net/connected
You can also find the IP-address with our Mullvad Check (expand the first green box).
Note that you cannot use the VPN server's hostname since the entry IP is different from your exit IP.
Using Mullvad on a router
When you connect to Mullvad using the Mullvad app or other app on your computer, then the port is forwarded and transported inside the encrypted VPN tunnel and your router will not see it. So any port forwarding setting in the router is not needed.
However if you are running Mullvad directly on the router (with OpenVPN or WireGuard set up) and don't use the Mullvad app then you need to forward the Mullvad port from the VPN interface or zone to your computer that runs the service that you want to use.
Some of our guides for using Mullvad on a router have information about how to forward a port to a client in the LAN.
OpenWrt routers and Mullvad VPN
DD-WRT routers and Mullvad VPN
Asus Merlin and Mullvad VPN
Using pfSense with Mullvad
Troubleshooting
Why is it not working?
- Make sure that you assigned the port to the device name that the Mullvad app is using, and that you are connecting to the city that you assigned the port to.
- Test the port first with iperf (if using Windows) or nc (if using Linux or macOS).
- Make sure that there is no firewall on the computer that blocks the port.
Ports reserved by Hyper-V and WSL2 (Windows)
If you have installed Hyper-V or WSL2 in Windows it will reserve some random port ranges. You can view them using this command:
netsh int ip show excludedportrange protocol=tcp
If you get a Mullvad port in those ranges then try to delete the Mullvad port and add a new one.
Important notes
- If you use OpenVPN protocol you have to disconnect and reconnect to Mullvad after adding a port.
- When adding a port to a device name it can take 10 minutes for it to be added to our VPN servers.
- The SOCKS5 protocol does not support port forwarding, so your app or service can not be using that.
- The port cannot be accessed using the Mullvad exit IP with an app on the same machine that you forward the port to.
- The port cannot be accessed with another computer/device that is connected to Mullvad using the same VPN server.
- When using OpenVPN protocol, if you are using multiple devices with the same account and connect to the same server, then only the most recently connected device will have the ports forwarded to it.
- If you are connected to a remote computer with the public IP and then connect to Mullvad on it then you may get locked out if the Mullvad port forwarding is not working.
FAQ
Q: Does port forwarding work with both TCP and UDP?
A: Yes
Q: Does port forwarding work with both IPv4 and IPv6?
A: Yes
Q: Can I assign a port to all cities like before?
A: No, all global ports have been removed because there are not enough ports in existence for all users to have a global port.
Q: Will you remove my ports if I don't pay?
A: We do remove ports 20 days after the accounts expires.
"WireGuard" is a registered trademark of Jason A. Donenfeld.